The T3 Stack is a web development stack that focuses on simplicity, modularity, and full-stack type safety. It consists of the following technologies:
- Next.js: A React framework that makes it easy to build server-rendered and static web pages.
- TypeScript: A typed superset of JavaScript that helps prevent errors and improve code quality.
- Tailwind CSS: A utility-first CSS framework that makes it easy to style your web applications.
- Prisma: An ORM that makes it easy to interact with your database.
- tRPC: tRPC stands for TypeScript Remote Procedure Call. It is a lightweight, type-safe RPC framework for TypeScript. tRPC allows you to easily build and consume APIs without the need for schemas or code generation.
There are many reasons to use the T3 Stack for your next web development project. Here are a few of the most compelling reasons:
- Full-stack type safety: The T3 Stack uses TypeScript, which provides full-stack type safety. This means you can catch errors at compile time, which helps improve code quality and prevent bugs.
- Modularity: The T3 Stack is modular, which means you can choose the technologies that are right for your project. This makes it easy to scale your application and add new features.
- Maintainability: The T3 Stack is easy to maintain. The use of TypeScript helps prevent errors and improve code quality. The modularity of the stack makes it easy to add new features and scale your application.
PlanetScale
is a serverless database designed to be scalable, secure, and user-friendly. It is built upon
Vitess
, an open-source database technology originally developed by YouTube. PlanetScale offers an excellent free plan, allowing you to have one MySQL database with a maximum of 1 billion row reads and 10 million row writes each month. It’s an excellent choice if you’re seeking a database service for your personal project.
For authentication, we’ll use NextAuth with JWT strategy. This approach provides a secure and efficient way to manage user authentication for your application. This method simplifies user authentication by eliminating the need for session management on the server side. JWTs facilitate secure transmission of user information, granting users seamless and authenticated access to protected resources.
Now, let’s begin setting up this project.
Create a T3 stack project
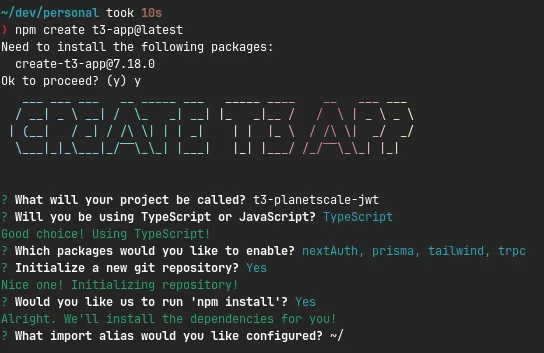
First, we’ll initialize our project with the T3 stack command.
npm create t3-app@latestYou’ll need to answer some command prompts. Make sure you choose to use TypeScript and enable nextAuth, prisma, tailwind, and tRPC packages.
Setup Planetscale
To proceed with this guide, you’ll need a PlanetScale account. Follow these instructions to create a database:
- Go to your organization’s overview page and click on “New database” > “Create a database.”
- Assign a name to your database using lowercase letters, numbers, or underscores. While you can use dashes, it’s better to avoid them due to potential complications with sharded databases.
- Choose a region. For optimal performance, select a region close to your location or your application’s hosting site.
- Select the suitable plan type for your database.
- Provide valid credit or debit card details. If you’re opting for the Hobby plan, no charges will be applied.
- Finally, click the “Create database” button to initiate the deployment of your database.
Your database will be created with a default production branch named “main.” This branch will be used for implementing schema changes and data insertion. While this is the initial branch provided, you can always generate new development branches (independent replicas of the production schema) based on the production branch for development purposes.
Make sure you’ve downloaded and installed the PlanetScale CLI. To authenticate with the PlanetScale CLI, enter the following:
pscale auth loginYou’ll be taken to a screen in the browser where you’ll be asked to confirm the code displayed in your terminal. If the confirmation codes match, click the “Confirm code” button in your browser.
You should receive the message “Successfully logged in” in your terminal. You can now close the confirmation page in the browser and proceed in the terminal.
Configure prisma schema
Next, we need to set up our database schema using Prisma. We’ll create a User model to store the id, username, email, password, and fullname.
model User { id String @id @default(cuid()) username String @unique email String @unique password String fullname String?}Since we’re using PlanetScale as our database service, in the datasource db block, set the provider to mysql and relationMode to prisma.
datasource db { provider = "mysql" url = env("DATABASE_URL") relationMode = "prisma"}Therefore, our schema.prisma file will look like this:
generator client { provider = "prisma-client-js"}
datasource db { provider = "mysql" url = env("DATABASE_URL") relationMode = "prisma"}
model User { id String @id @default(cuid()) username String @unique email String @unique password String fullname String?}Afterwards, you should adjust your environment settings to configure the Prisma data source. Locate the .env file in your application’s main directory and overwrite its current content with this:
DATABASE_URL='mysql://[email protected]:3309/<DATABASE_NAME>'Now you should establish a local connection to your PlanetScale database branches through the PlanetScale CLI. In a different terminal window, execute these commands:
pscale connect <db-name> <db-branch> --port 3309Maintain this connection active. This sets up a safe link to PlanetScale and is active on the designated local port. In the terminal, you’ll receive a local address. This can be utilized to connect to a MySQL client, if desired.
The next step involves pushing your Prisma schema. Open a new tab in your terminal and execute this command:
npx prisma db pushWhen working with Prisma and PlanetScale, it’s advisable to follow the workflow of using prisma db push instead of prisma migrate. You can find additional information about prisma db push here.
Upon successful completion, your PlanetScale database schema will align with the Prisma schema you set up in prisma/schema.prisma.
Configure NextAuth
There are a couple of steps to set up our JWT authentication flow within NextAuth.
Define response and session types
export type APIResponse<TData> = { status: "success" | "error"; message: string; data?: TData;};The code above defines a TypeScript type called APIResponse, which represents the structure of responses from APIs in the application. It consists of three main parts: the status property indicating if the response was successful or encountered an error, the message property providing a human-readable description of the response, and the optional data property that holds the actual response data, which can vary in type based on the context. This type helps maintain a consistent format for API responses throughout the codebase, ensuring that they can be easily understood and processed.
export type LoginResponseData = { username: string; email: string; accessToken: string; id: string;};
declare module "next-auth" { interface Session { user: LoginResponseData; }}The code segment includes TypeScript type definitions within the next-auth.d.ts file. It introduces a custom type named LoginResponseData, outlining the structure of data received after a successful login attempt, encompassing fields such as username, email, access token, and ID. Additionally, the file extends the existing Session interface from the ‘next-auth’ module. It adds a user property to the session, associated with the LoginResponseData type, enabling the storage of authenticated user data within session objects. This allows for consistent handling of user-related information across the application’s authentication flows.
Use NextAuth Credentials Provider
export const authOptions: NextAuthOptions = { providers: [ CredentialsProvider({ name: "Credentials", credentials: { username: { label: "Username", type: "text", }, password: { label: "Password", type: "password", }, }, async authorize(credentials) { const res = await fetch(`${env.BASE_URL}/api/login`, { method: "POST", headers: { "Content-Type": "application/json", }, body: JSON.stringify(credentials), });
const { data: user }: APIResponse<LoginResponseData> = await res.json(); if (res.ok && user) { return user; } else { return null; } }, }), ], callbacks: { async jwt({ token, user }) { return { ...token, ...user }; }, async session({ session, token }) { // eslint-disable-next-line @typescript-eslint/no-explicit-any session.user = token as any; return session; }, }, secret: env.NEXTAUTH_SECRET, session: { strategy: "jwt", }, pages: { signIn: "/login", }, jwt: { secret: env.NEXTAUTH_SECRET, },};
export const getServerAuthSession = (ctx: { req: GetServerSidePropsContext["req"]; res: GetServerSidePropsContext["res"];}) => { return getServerSession(ctx.req, ctx.res, authOptions);};- The
providerssection indicates that the authentication method being used is theCredentialsProvider. This provider allows users to authenticate using a username and password. Theauthorizefunction within the provider handles the authentication process. When a user attempts to authenticate, the credentials they provide are sent to an API endpoint responsible for login. If the credentials are valid and the response is successful, the user object is returned. Otherwise, if the response indicates an error or unsuccessful authentication,nullis returned. - The
callbackssection defines callback functions that are triggered during different stages of the authentication process. Thejwtcallback is responsible for combining the JSON Web Token (token) with the user object (user). This merged data is used for subsequent requests to authenticate the user. Thesessioncallback attaches the user data from the token to the session. - The
secretfield contains a sensitive secret value used for cryptographic operations related to authentication. This value is loaded from theenv.NEXTAUTH_SECRET. - The
sessionsection specifies the strategy used for managing user sessions, and in this case, it uses the ‘jwt’ strategy. This means that JSON Web Tokens are utilized to maintain session information. - The
pagessection customizes the URLs for authentication-related pages. Specifically, it sets the URL for the sign-in page to ‘/login’.
Configure tRPC middleware
Inside src/server/api/trpc.ts, you can remove the prisma from createInnerTRPCContext since you’re not using a session strategy that maintains authentication inside the database.
const createInnerTRPCContext = (opts: CreateContextOptions) => { return { session: opts.session, prisma, };};We also need to update our tRPC middleware as follows:
const enforceUserIsAuthed = t.middleware(({ ctx, next }) => { if (!ctx.session || !ctx.session.user) { throw new TRPCError({ code: "UNAUTHORIZED" }); } return next({ ctx: { // infers the `session` as non-nullable session: { ...ctx.session, user: ctx.session.user }, }, });});This middleware is applied to TRPC methods to ensure that a user is authenticated before proceeding. It achieves this by checking if the session exists and contains a user property. If not, it throws a TRPCError with the code ‘UNAUTHORIZED’, indicating that the user lacks proper authentication. If authentication is successful, the middleware allows the method to continue executing and passes along an updated context that ensures the presence of the session object with a non-null user property. This middleware plays a vital role in enforcing user authentication across TRPC methods, safeguarding routes that require authorized access.
The complete setup for our tRPC will look like this.
import { type CreateNextContextOptions } from "@trpc/server/adapters/next";import { type Session } from "next-auth";
type CreateContextOptions = { session: Session | null;};
const createInnerTRPCContext = (opts: CreateContextOptions) => { return { session: opts.session, };};
export const createTRPCContext = async (opts: CreateNextContextOptions) => { const { req, res } = opts;
// Get the session from the server using the getServerSession wrapper function const session = await getServerAuthSession({ req, res });
return createInnerTRPCContext({ session, });};
import { initTRPC, TRPCError } from "@trpc/server";import superjson from "superjson";import { ZodError } from "zod";
import { getServerAuthSession } from "~/server/auth";
const t = initTRPC.context<typeof createTRPCContext>().create({ transformer: superjson, errorFormatter({ shape, error }) { return { ...shape, data: { ...shape.data, zodError: error.cause instanceof ZodError ? error.cause.flatten() : null, }, }; },});
export const createTRPCRouter = t.router;export const publicProcedure = t.procedure;
const enforceUserIsAuthed = t.middleware(({ ctx, next }) => { if (!ctx.session || !ctx.session.user) { throw new TRPCError({ code: "UNAUTHORIZED" }); } return next({ ctx: { // infers the `session` as non-nullable session: { ...ctx.session, user: ctx.session.user }, }, });});
export const protectedProcedure = t.procedure.use(enforceUserIsAuthed);Create API Route for login and register user
The /api/login route handles user authentication by processing a POST request with the provided username and password. It utilizes JWT (JSON Web Tokens) for authentication. It retrieves the username and password from the request body. We use Prisma to query the database for a user with the provided username. If a user is found, it proceeds to compare the provided password with the hashed password stored in the database using bcrypt. If the passwords match, a JWT is generated and signed with the user’s information, and an access token is included in the response, along with the user’s ID, username, and email.
const KEY = env.NEXTAUTH_SECRET as string;
export default async function handler( req: NextApiRequest, res: NextApiResponse<APIResponse<LoginResponseData>>,) { const { method } = req;
if (method !== "POST") { res.status(400).json({ status: "error", message: "Method not implemented", }); return; }
const { username, password } = req.body; if (!username || !password) { res.status(400).json({ status: "error", message: "Request missing username or password", }); return; }
const user = await prisma.user.findUnique({ where: { username: username }, });
if (!user) { res.status(401).json({ status: "error", message: "User not found", }); return; }
const userId = user.id, userEmail = user.email, userPassword = user.password, userUsername = user.username;
const isMatch = await bcrypt.compare(password, userPassword); if (!isMatch) { res.status(400).json({ status: "error", message: "Password incorrect", }); return; } const payload = { id: userId, username: userUsername, email: userEmail, }; try { const token = jwt.sign(payload, KEY, { expiresIn: "1d" }); res.status(200).json({ status: "success", message: "User successfully logged in", data: { id: userId, username: userUsername, email: userEmail, accessToken: token as string, }, }); } catch (e) { res.status(500).json({ status: "error", message: "ERROR SIGN TOKEN", }); } return;}The /api/register route handles user registration by verifying provided details, hashing the password, and creating a new user record in the database. It returns relevant success or error responses based on the outcome of the registration process.
type RegisterResponseData = { id: string;};
export default async function handler( req: NextApiRequest, res: NextApiResponse<APIResponse<RegisterResponseData>>,) { const { method } = req; if (method !== "POST") { res.status(405).json({ status: "error", message: "Request method not allowed", }); return; } const { username, password, email, confirmPassword } = req.body;
// check if password and confirm password match if (password !== confirmPassword) { res.status(400).json({ status: "error", message: "Confirmation password does not match", }); return; }
const hashedPassword = await bcrypt.hash(password, 10); try { const user = await prisma.user.create({ data: { username: username, email: email, password: hashedPassword, }, });
res.status(201).json({ status: "success", message: "Account created successfully", data: { id: user.id, }, }); } catch (error) { return res.status(400).json({ status: "error", message: "Username or email is already used", }); } return;}Testing
User login and register
To register a new user, create a registration page that accepts input for username, email, password, and confirmation password. Send this data to the /api/register route.
const onSubmit = async (data: RegisterForm) => { axios.post("/api/register", data).then(() => { router.push("/login"); });};For user login, you’ll need a login page that takes the username and password as inputs. Then, utilize the signIn() function provided by next-auth, passing the username and password as arguments. Detailed information about this function can be found in the next-auth documentation.
const onSubmit: SubmitHandler<LoginForm> = async (data) => { signIn("credentials", { username: data.username, password: data.password, redirect: false, }).then((res) => { if (res?.ok) window.location.replace("/"); });};tRPC query and mutation
Querying and mutating data using tRPC is straightforward, akin to using TanStack Query. Here’s an example of data querying:
const response = api.common.getAllNews.useQuery({ category: "sport", author: "John Doe", min_views: 20000,});And for data mutation:
const mutateNews = api.news.createNews.useMutation();
function handleCreateNews(data: NewsData) { mutateNews.mutate({ title: "T3 Stack is awesome", desc: "Scaffold your next project with T3 Stack for excellent type safety", author: "M. K. Bughowi", });}Querying and mutating data in protected routes is nearly identical to how it’s done in public routes. Authentication is automatically managed by tRPC and NextAuth.
However, differences arise when you attempt to access user credentials within your tRPC route. Here’s how you can retrieve the username and user ID from the tRPC context:
export const userRouter = createTRPCRouter({ updateProfile: z .object({ fullname: z.string(), username: z.string().min(6).max(20), }) .mutation(async ({ ctx, input }) => { await prisma.user.update({ where: { id: ctx.userId, }, data: { fullname: input.fullname, username: input.username, }, }); }),});